Thursday, June 26, 2008

Potato and Luncheon Meat Combo

Oops, I wanted to submit this entry to Weekend Wokking, a world-wide food blogging event created by Wandering Chopsticks celebrating the multiple ways we can cook one ingredient, but as usual I always do last minute and then I realized that the last day was June 29th and not June 30th for submission. So I am too late but the host this month is Todd and Diane of White on Rice Couple. If you would like to participate or to see the secret ingredient, check who's hosting next month. The "secret ingredient" for this mth is the humble POTATO and I thot my recipe here may stand a chance cos it is simple and delicious. Really you have to try this. It is so yummy!


Simple ingredients -
1) Potato - cut in cubes
2) Luncheon meat - also cut in cubes. The only luncheon meat closest to the Maling luncheon meat I am used to in Malaysia is the Great Value (from Walmart) luncheon. Hubby-D has been here in Dallas for many years and must have tried all different brands so I trust him.
3) Mayo - I prefer the japanese mayo cos it is a little sweet but any mayo would do even ranch mayo dressing.
4) Oil for frying.


Simple Steps -
1) Fry up the luncheon meat first till cripsy.


2) Then, with the same oil, fry up the potato cubes.


3) Drain oil, put the 2 ingredients together and then the secret ingredient to bind them together - mayo. Oh! Yum! mix together and serve and eat immediately. Voila! Ready to eat! This is super yummy! It is so fast and simple and can be eaten with rice or just as appetizer even as snacks!


Monday, June 23, 2008

Stir-fry French beans with Prawns

Inspiration - I googled and apparently french beans is the aristrocrat of all beans. Hmm, I wonder what that means but anyway, it is such a versatile veggie and can be cooked in a lot of different versions. This recipe here is just a simple one which you can cook up in less than 5 mins.

Simple ingredients :-

1) A handful of french beans, cleaned and cut.
2) Some prawns
3) some dried prawns
4) Garlic, Seasoning - soy sauce, salt and oyster sauce.


Simple steps -

1) First, stir-fry the garlic, then add the dried shrimp and stir-fry till fragrant. Add the shrimp and stir-fry for just less than 1 minute. Quickly, turn up the fire and put in the french beans. Give a quick toss and add a little water if too dry.


2) Stir-fry all ingredients for less than 2 mins and Voila! Ready to eat! Yum Yum!


Verdict - Actually, for this dish my Hubby-D was the chef. He came back from work and nicely volunteered cos I accidently cut my finger while opening a can. He is so sweet and he did such an excellent job. He turned up the fire to stir-fry (like the chefs in the restaurants) and the whole kitchen was so fragant with the smell of this dish and smoky too :).

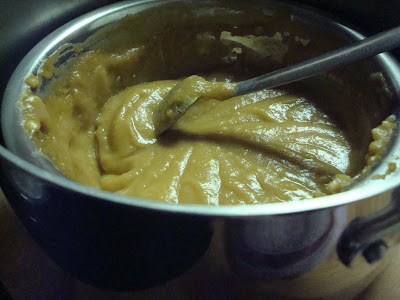
Homemade Kaya

Inspiration - Before I came to Dallas, I use to stay in PJ Malaysia. I remember whenever I eat around PJ SS2, Seapark, Chow Yang restaurants for dinners, nearly 90% of the time, I will see "the Kaya lady". She is a neatly dressed woman walking around with a basket full of kaya. She will go from table to table saying "homemade kaya", "homemade kaya". My usual comment about her is that she moves so fast from table to table that before she finish her sentence she has already left. No eye contact, no waiting to see anyone was interested to buy. So from all the times, I only bought once. But the real reason I don't buy her kaya is her kaya is the greenish type and I like the brownish kaya. From young, I only saw and ate brownish kaya at home. In her younger days, my grandma used to make kaya but now the recipe has been passed and perfected by Aunt Judy. She brieftly described the recipe and the way to make it to me once and I am more than eager to try.

Simple ingredients -
1) 4 eggs
2) Sugar - 200gm
3) 1 coconut from can - 350ml or 400ml
4) Pandan leaves

Simple steps:-
1) The secret to making the kaya brown in colour is to caramelized some sugar. Therefore take 100gm of sugar and caramelized by stirring the sugar in low heat till the sugar dissolved, start to brown and liquidate.


2) Next, stir the eggs and coconut milk and remaining sugar in a separate bowl until all ingredients have disolved and well blended. Pour into the caramelized sugar. Put your pot onto a bigger pan with water (double boiled concept). Ensure medium to low fire. Continously stir the mixture. Also include panda leaves (tied in knot) into mixture.


3) After 1 of stirring, mixture will start to brown and thicken.


4) Your kaya should be ready. Remove the pandan leaves if you have them inside. Voila! Ready to eat! Yum yum!


Verdict - I made this in a jiffy while also trying to cook another dish. So I was kinda dissappointed cos it did not turn out as well as I wanted. The taste and aroma is great but I am not happy with the texture and colour. I prefer it to be more creamy and darker brown. Basically I should have caramelized more sugar in the beginning and also ensure the fire is low and stir for probably 2 hrs instead of 1 hr. Will try again but meanwhile I will have some kaya toast!

Friday, June 20, 2008

Har Bee Luah aka Spicy Dried Shrimp


Inspiration :- This is a tribute to my grandma, she is a wonderful woman, she may have love-hate relationships with the family but we all know deep down she is a woman who worked hard all her life to raise 5 kids and now trying to grow old gracefully. As far as I can remember, tracing back to my childhood, she has always cooked this spicy dish. In Hokkien "har bee luah" literally translated to "dried shrimp spicy". I love this dish and probably where I picked up my palate for spicy dishes. So, here, I am in Dallas trying for the 1st time to replicate one of my grandma's signature dish.

Simple ingredients -
1) Dried Shrimp - one handful

2) Chilli paste - depending on how spicy you want

3) Salt and sugar to taste
4) Oil for frying


Simple steps :-
1) Soak dried shrimp for at least 30 mins. Then mince it. It does not need to be too fine. Some texture taste better.


2) Filled wok with 3-5 tablespoons of oil. You can also start with stir-fry of minced garlic and shallots. Then add in the minced dried shrimp. Stir-fry till fragrant in medium heat.


3) Add the chilli paste, mix well and continue to stir-fry.


4) For those with sensitive noise, be warned that you may accidently get a whiff of the spice through the nose and it may inadverdently spark a series of uncontrollable spicy "ah choooos".
I often hear it whenever my grandma or mom is cooking this dish.

5) Once the shrimp is aromatic, slighty reddish brown and then Voila! Ready to eat! Yum yum!


Friday, June 13, 2008

Prawn Mee - My first try!!!


Inspiration - Ok Ok, I kinda cheated. Did not make the soup from scratch. I had a little help from this pkt of instant prawn mee noodles I brought specially from Malaysia. But, but, please give me credit that I need put a lot of effort to make it look like I was ordering a delicious prawn mee from a kopitiam. Ohhh! I miss being able to just go out to any hawker stall and just order anything noodles, meehoon, chicken rice, wan tan mee...etc

Simple steps :-

Get all the ingredients ready.

1) Prawns - I boiled the prawn heads in soup for the "real" aroma. Do not boil the actual prawns for too long as it will be tough and not juicy to eat.
2) A piece of pork - ah ha which I also boil in the same soup....to make the soup tastier. Cut the boiled pork into slices.
3) Hard Boiled eggs - I boiled it separately... not in the same soup!! :)
4) Taugeh
5) Fried shallots and garlic. Also if u noticed I did fry some pieces of pork lard - I had to make it real!
6) Noodles - I just use the instant noodles - since the soup is from the instant noodle seasonings.


Boil the soup, prepare all the garnishing, and Voila! Ready to eat! Yum Yum!

Verdict - I really impressed my hubby-D who complimented on how hawker-like it feels on a Saturday morning though out from my lovely home in Dallas Texas.

Roast Chicken

Inspiration - If you all don't know, I am now in Dallas USA and have been just cooking lovely homely Malaysian food. Since I am in a cowboy land whereby they barbeque and oven roast or microwave almost everything, I told my first attempt at roast chicken would be appropriate.


Simple ingredient -
1. 2 whole chicken thigh
2. Vegetable - err lookd like cucumber but it's not, ohhh! the name just escapes me for now.
3. Marinate on chicken - salt, pepper, some soy sauce and oyster sauce if desired - how Asian of me! :)

Simple steps -
1) Just marinate the chicken with Salt, pepper, soy sauce and oyster sauce. Actually, it will taste better if marinate overnight. Just lay the chicken thighs on baking tray, the vegetable...aiyo, i still can't recall the name. Hang on I will get it by the end of this blog!! Put it into oven, here I am using only the toaster oven cos my portion is small and it can fit. Much easier and less messy and less washing.

2. Roast for 30 mins at temp of 350'. Watch the chicken once in a while to check how it's doing. not really required to turn unless you want the bottom side of chicken to be ultra crispy too. The beauty of roasting together with the vege is that it will be ready at the same time and it will be aromatic with the chicken's oil and stock.


3) Voila! Ready to eat! Yum yum! Here I served it with some plain spagetti and spinach. Oh YEAH...I still could not remember the vegetable's name so I did a google search..here it is Zucchini!! Arrrgh - for the life of me, this word just slipped my mind and all I can think of is cucumber and capsicium for some reason. And btw, the zuchini taste great.